Enter Customer Contacts provides the ability to record all communication with a Customer to their account. Add a new or edit an existing Contact which can be defined as Sensitive, making the contact visible to only those with adequate security.
| Access |
| Grant permission to User Profiles in Access User Profiles > select a User Profile > Menu Security > Accounts Receivable > Main Menu > Enter Customer Contacts. |
Search for an existing Contact using active fields. Learn more here or use  to search for an existing Customer Contact. See Select Customer Contacts for additional information.
Add a Customer Contact
Customer Contacts can be added using two different methods, through the Contacts tab within the Account or using the Enter Customer Contacts from the AR menu. Select Add button to create a new Customer Contact if using Enter Customer Contacts or the Add icon if adding through the Customer account.
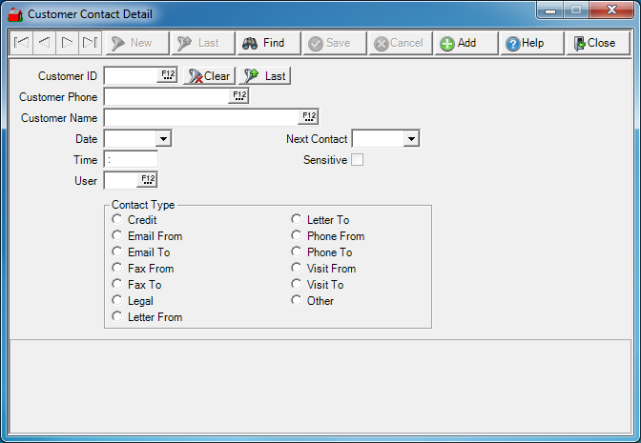
Search for a Customer using
- Customer ID- Enter the Customer ID or select F12 to search.
- Customer Phone- Use the Customer Phone to search for the account or select F12 to search.
- Customer Name- Enter the Customer Name or select F12 to search.
Once a Customer is selected, enter the specifics about the Contact.
The Date field defaults to the current date. Modify the date by using the drop down calendar or click into the date field and enter the contact date using the mm/dd/yy date format.
Time will also default to the current time. Update this information by clicking into the field and use the HH:MM time format.
Record who made the contact by entering a User ID in the User field. Select F12 to search if the current user did not create the contact.
Establish a Next Contact date using the drop down calendar or enter a date using the mm/dd/yy date format. This field also defaults to the current date.
If permission has been granted, a contact flagged as Sensitive can be entered by selecting the checkbox. See Access User Profiles > Accounts Receivable to grant access.
Select the Contact Type from the available list.
|
|
|
|
|
|
|
|
|
|
|
|
|
|
Enter Notes field (unlabeled) regarding the Contact in this 32,767 character alpha-numeric field.
Set a reminder to create a follow up Contact by setting a Next Contact date which defaults to current date. Enter the date in the mm/dd/yy format or select the drop down calendar to change.
Contacts can be flagged as Sensitive which will mark the Contact as visible only to users with adequate security. The ability to select the checkbox is also only available to those with adequate permission.
Select Save to add the Contact to the Customer account.
Create the report Customer Contacts found in the Reports > Customer Contacts. Learn more here.